Tips, Tricks, and Tutorials

Teaching you fun and interesting things to do with your digital images. Whether it's highlighting a new app, or a tutorial on how to edit a photo, we want to help you make the most of your memories.

Featured Thought

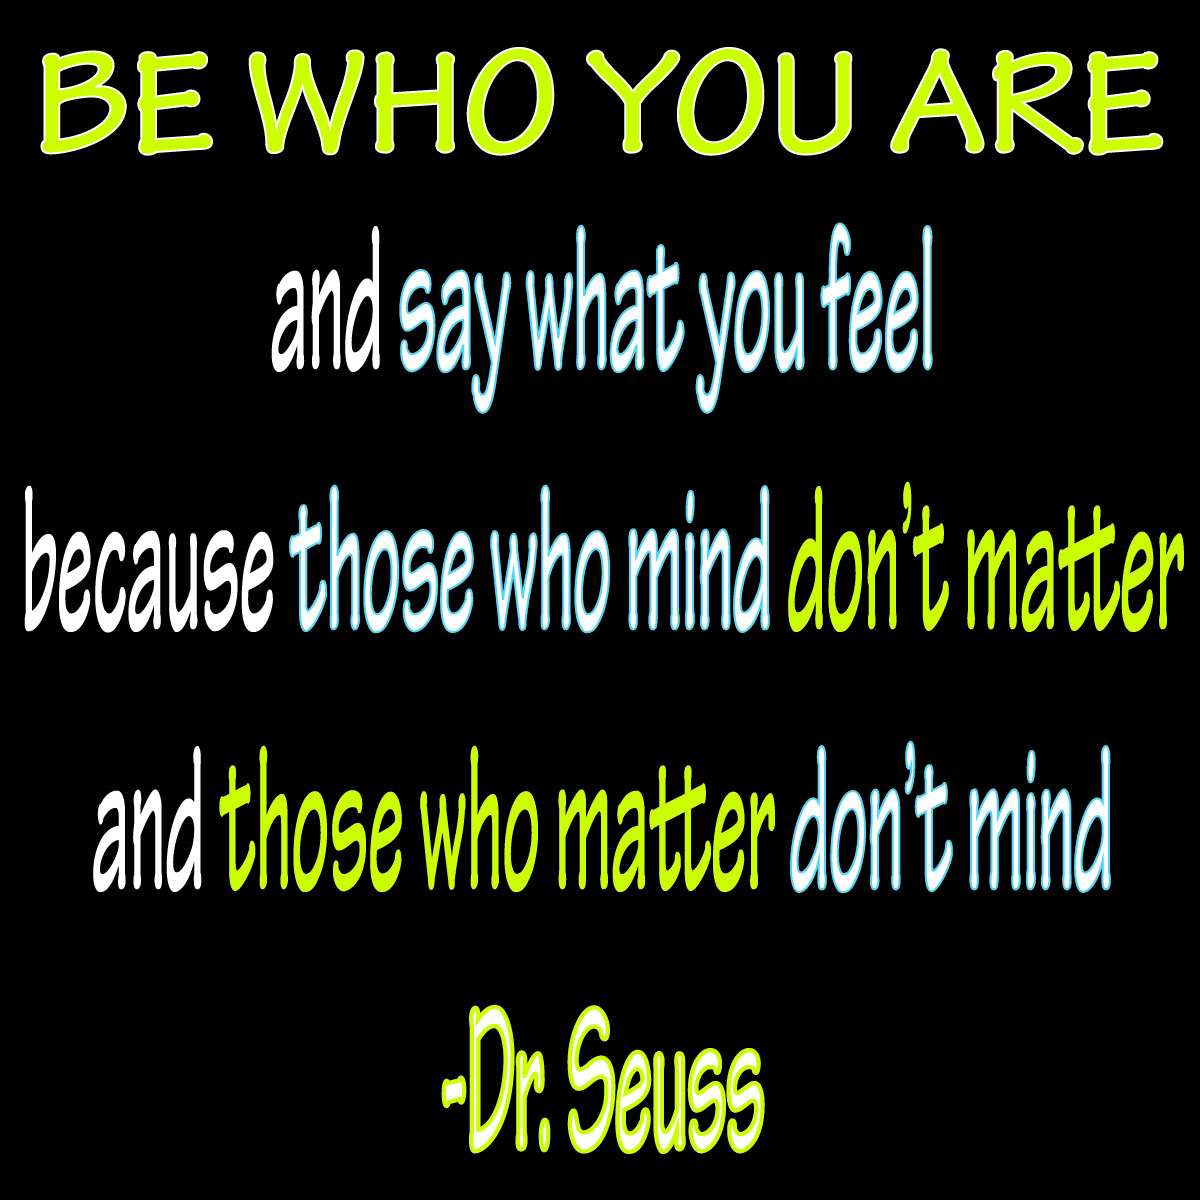
Visit our blog every Thursday when we will post a brand new thought or quote! What's the point of our 'Thursday Thought' feature? Because everyone could use a good one every now and then.

Customer Feedback

Want to see your raving reviews here? Comment on one of our social media sites, or email us at customerservice@larsendigital.com. We love hearing from you!

Digital Photo Makeover

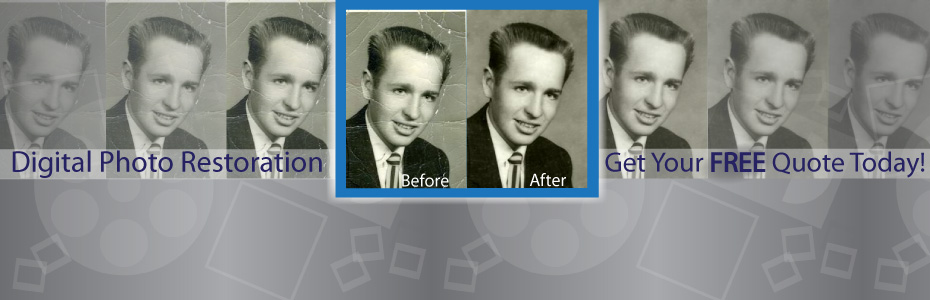
Your old film and photos can go through a lot. Whether they are extremely discolored, torn or ripped by a child, involved in a flood or accident, we want to fix it!

Check This Out!

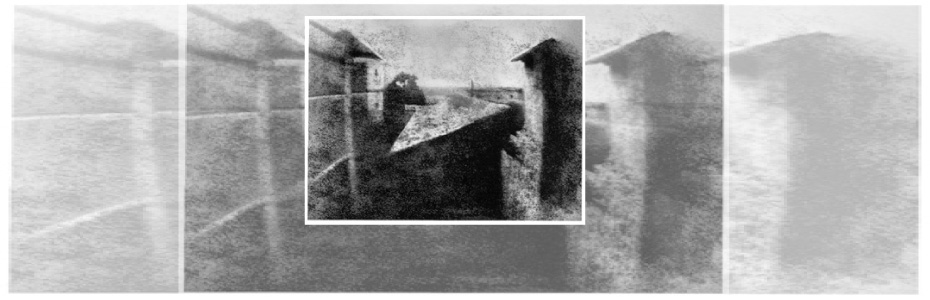
The world's very first photograph! We wouldn't have a business if the photography industry never progressed. It's amazing how far we come, and how advanced we continue to get.

We pride ourselves in our track record since we started business back in 1995. We have always made sure that each and every one of our customers is treated with professionalism along with a personal touch. We're proud to be the most trusted source of slide and negative scanning in North America. We are located beneath the snow-capped peaks of Mount Ben Lomond in Pleasant View, Utah. Pleasant View is 45 miles north of Salt Lake City, host of the 2002 Winter Olympics. All work is done in house here in Utah. We do not outsource any work out of the country like many other companies do.

Monday, September 17, 2012

Cool Gadget

The Almighty Board
The Almighty Board
A cooking tool that allows you to weigh food, read your recipes, use it as a cutting board, and recipe step by step cooking instructions?  Read more about it at 'Tom's Style'

Friday, September 14, 2012

Family Mysteries- What Really Happened?


Thursday, September 13, 2012

One Perfect Memory


Thursday, September 6, 2012

Thursday Thought


Thursday, August 30, 2012

MyMemories Suite v3 Tutorial

So you've had your images all converted to digital format and you want to do something special with them?  Well digital scrap-booking is the perfect answer, and the My Memories software is ranked as the best!  With this software you can create photo books, download your digital scrapbook on your iPod for portable viewing, or even create a calendar using the designs you create!  Here you will learn the most simple way to create your first digital scrapbook.

Step 1: Open the software.  You have the option to create your scrapbook using pre-designed templates, or by starting on a blank slate, and creating your own.  For the purpose of just learning the software, this tutorial will go the route with the ready to go pages, so select “Create Album From Designer Template”.


Step 2: Choose the template style you want your scrapbook to be.  They have choices from Winter and Halloween, to Contemporary and Simple.  I have decided to use the “Sweet Baby Girl” set.


Step 3: Organize the order of your pages.  You can add more pages so that certain styles repeat by doing a simple drag and drop, or you can removes templates that you don’t like by selecting a page in the “Page Arrangement” section, and simply clicking “Remove”.


Step 4: Let’s choose our settings for how you want your images placed.  The software will ask you if you want to “Pick and Click” which will allow you to choose the pictures you want, and place them wherever you want.  There is also an option to do a “FastFill”, where you still get to select what pictures you want in the scrapbook, but the software will automatically place it in photo slots.  This tutorial will show you how to do the “Pick and Click” option.


Step 5: Now it’s time to designate where you want your scrapbook to be saved on your computer, and what to name it.  Click “Finish” when you have completed these sections, and let the fun begin!


 Step 6:  Your first scrapbook page will automatically load, and you will see there are grey images with the text “Your Photo Here”- that’s where your pictures will go!  To choose your pictures, click on the “Photos” icon under the “Photos” tab.


Step 7: While choosing your photos, you can view a small thumbnail version on the side to help in your decision making.  This software allows you to only choose one image at a time, so when you have picked an image, press “OK” to place it on your page.


Step 8: Now your image is on the page, but it needs to be placed in the gray area!  Simply click and hold your mouse on the image, and drag it over to the gray area until that said area turns blue, as shown in the picture below.  Release your mouse and your image is now in it’s designated spot!


Step 9: Personalize!  For adding your own text,  just click on the “Add T” under the “Text” tab, and a text box will appear where you can enter whatever text you wish.  Or, to just change the text in the pre-designed text box, click on “Your Text Here”.  To make the text have more of a designed element to it, select the “Word Art Designer” tab.  This software also enables you to add embelishments.  You can choose which embellishments to add by selecting the “Embellishments” tab.  Embellishments will include decorative images such as the bows and ribbons already seen on the page shown.  They will also have choices for art images such as pencils and paperclips for a back to school feel, or abstract designs for a background element.


Step 10:  Once you have placed all the images and extras you want on each of the pages in your album, select the tab “Check Album” where you can preview what your scrapbook will look like, and check for spelling and errors.


Step 11:  Now that you have completed your digital scrapbook, click on the tab “Share Album” where you have lots of choices in saving your book.  You can print your book, create a photo book or calendar, or even put the scrapbook on your ipod!  


After completing this tutorial you will be a pro at managing this digital scrapbooking software!  You can probaby even design your own templates!  For more questions on managing this program, as well as purchasing additional templates, pages, and embellishments, visit www.mymemoriesblog.com.

Thursday, August 23, 2012

Thursday Thought


Thursday, August 16, 2012

Back to School Special!


Enter code BACKPACK15 at checkout
and receive $15 OFF your purchase of $100 or more!

Thursday, August 2, 2012

Thursday Thought


Tuesday, July 24, 2012

Our Picks: FREE Photo Editing Software


This list is for those who:
1)      Cannot afford professional photo editing software such as PhotoShop,
-Or-
2)      Are novices when it comes to editing your own images.
 Here we will rank 4 different FREE photo editing software programs to help guide your decision.   Each category is rated on a scale of 1 to 5, with 5 being absolutely amazing, and 1 being extremely lacking.

GIMP

User Friendly-2
Available Functions-4
Results-4
Overall Score-3         
                      
Pros: This software is what you want if you are looking for a free version of Adobe PhotoShop.  It offers numerous technical functions from brightness adjustment and cloning to vector art creation and image distortion.
Cons: Not for the casual photo editor!  If you are a beginner there will be many youtube tutorials in your future as you learn the basics in using this software.  It also requires a download of the software rather than working on a webpage, so you will want to make sure your computer can handle it!
Bottom Line:  The best free software for those who know what they are doing!

Fotoflexer

User Friendly-3
Available Functions-2
Results-3
Overall Score- 2 1/2   
               
Pros: Lots of fun effects, text additions, and borders!  With Fotoflexer you can upload your edited images straight to your favorite social media website.  Edit without having to download anything!  All you need to do is visit their website, upload your photos, and edit away.
Cons:  While this software contains a lot of fun effects, it’s actual photo editing functions are limited, and most are automated. 
Bottom Line:  Good website for creating fun imagery with images that need little to no fix-ups.

Picasa


User Friendly-4
Available Functions-3
Results-3
Overall Score-3 1/2   
                                         
Pros: Contains lots of interesting photo effects, and a neat Creative Kit.  Allows you to add text to your images, and use the program as a default photo viewer.
Cons: As with fotoflexer, this software comes with limited functionality.  Picasa does require a download to your computer.
Bottom Line: Lots of fun effects and stickers + Solid Basic Photo Editing Functions = Awesome Free Software

Windows Live Photo Gallery


User Friendly-2
Available Functions-2
Results-2
Overall Score-2    
                            
Pros: Windows allows you to create slideshows and movies with this free software, as well as order prints and upload your edited images to your favorite social media website.
Cons:  While it does contain a high quality clone tool for fixing imperfections, there are not many other functions to choose from when using this program. 
Bottom Line: It’s an ok free program.  Better than nothing! 

Thursday, July 12, 2012

Thursday Thought- Happiness


Thursday, June 28, 2012

Thursday Thought


Wednesday, June 27, 2012

What to Look For When Buying a Camera


Those in the market to buy a digital camera are in the right place!  There are so many terms used when researching, and it’s important to know what they are, so you get what you need!  Here you will find the most common verbiage when dealing with digital cameras to help you in your exciting purchase.

First, there are 3 main types of cameras:

SLR (Single Lens Reflex) - A camera that uses a mirror system to direct light, and can offer more accurate framing and depth of field.  Because of this, what you see in the viewfinder is exactly what your picture will be.  The user can manually adjust the lens’ focus, and many other features.
DSLR (Digital Single Lens Reflex) - The same as an SLR Camera, however this camera stores your images in digital format on a memory card.
Point and Shoot - An easy to use camera with limited functions.  Most use autofocus, with flash units that are built in.

Now onto the features that you should look for, or know about in a camera:

AC Power- Your camera will be charged in a wall outlet or computer USB port rather than by traditional batteries. 
Aperture- How much your lens opens through which light will pass.
Aspect Ratio- The ratio of your images’ horizontal and vertical dimensions.   Most cameras have an aspect ratio of 4:3, but if you are looking to be able to print perfect 4X6 images, then look for a camera that offers 3:2 ratio mode.
Aspherical Lens- A lens that is not perfectly spherical, but creates superior images by reducing or even eliminating aberrations (lighting imperfections).
Digital Image Stabilization- Used to minimize the effect of blurring or shaking while the camera is in the process of capturing video.
Digital Zoom- Magnifies the center of an image, keeping the same aspect ratio, while reducing the amount of pixels.
Exposure- The amount of light that reaches the photographic film, and is determined by the shutter speed and aperture
Frame Rate- How many image frames are shown per second.  The higher the Frames per second, the more “real” or “in person” the imagery looks.
Image Resolution- Amount of pixels in the length of an image- Referring to the detail of the image.  The higher the resolution, the more detailed your picture will be.
Macro- Offers the ability to focus really well on small objects that are close to the camera.
Megapixel- A measurement to describe how many dots or pixels are in an image.   The more pixels contained in an image will mean more detail, and more detail in an image means you can make large prints from your images.
Optical Zoom- Allows the camera to zoom in on an object without affecting the detail or resolution of the image.  It uses the lens to draw the image closer, much like binoculars.
Pixel- One Pixel refers to one spot on an image.  Pixels combine to make up the resolution of an image, and as with most everything, the more pixels you have, the better your image is going to look.
Shutter Speed- How long the camera’s shutter stays open to capture an image.

Friday, June 22, 2012

Unsolved Family Mysteries

What you are about to see is a true story.


To learn more about preserving your memories visit our website

Thursday, June 14, 2012

Thursday Thought


Tuesday, June 5, 2012

Beginners Guide To Using Cinemegr.am

Cinemegr.am is a new app that combines the power of video with the stillness of photo to create fun and quirky imagery.

Here is an example:
Created with cinemagr.am
(Notice how the street is moving, but the signs and lights are still?)

Here we will show you how to create such a visual, with added effects such as giving it a vintage touch.

1-Get the app installed!  It's currently only available for your apple products.
 2- Your home page will look like the image below.  To view the work of others, click on "popular" or "latest".  To create your own, click "capture"
 3-Film whatever it is you want!  Most likely, your footage will be too long, and you will be required to edit it down.  Like the image below, you will need to select a portion of frames that will fit between the yellow lines at the top.
4- Create your mask!  Selecting where you want your mask to be tells the app what parts of your video you want to remain moving.  Everything else will remain still.  Simply color over the desired areas with your finger to color your mask.
5-The next step is to add your vintage flavor.  Cinemegr.am gives you several options, or you can simply leave it "raw" or untouched.
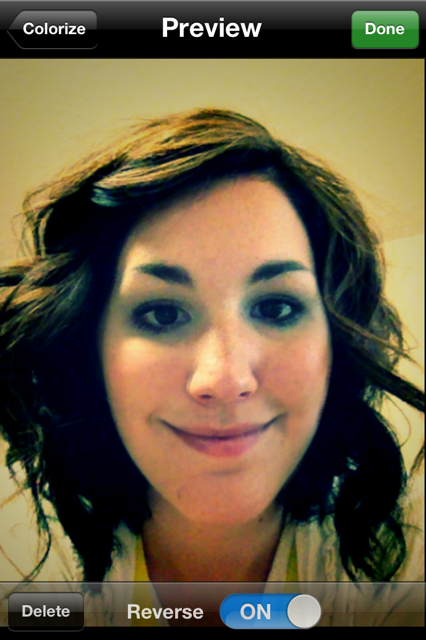
6-Last step is to preview your work.  You can decide whether you want the "Reverse" on or off.  With the "Reverse" on, it will play through once, then immediately replay going backwards.  Press "Done" and you've created your cinemegr.am!  Your video will appear in a news feed, much like Instagram.

Here is our final product:

Created with cinemagr.am

Hope you've enjoyed creating your own cinemegr.am invention.  It can be a fun and interesting way to share the moments of your day.

Thursday, May 31, 2012

Larsen Digital's Thursday Thought!


Tuesday, May 22, 2012

Beginners Guide to Removing Red Eye

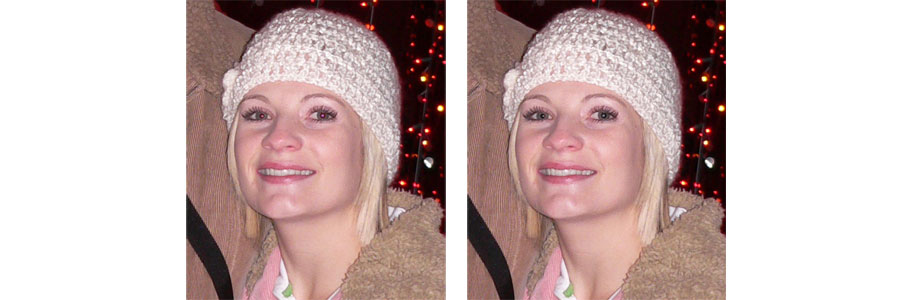
red eye removal before and after

red eye removal example
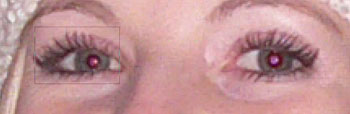
Red eye is an annoying and common problem with photos when taken using a flash. Luckily fixing red eye is extremely easy using PhotoShop.

Red Eye Removal Step 1:

Once you have your digital image opened in PhotoShop you will want to zoom in on the eyes. Your zoom tool is located on the left side panel, it looks like a magnifying glass.red eye removal zoom

Red Eye Removal Step 2:

Next you will want to select your Red Eye tool. It is located on the left side panel. It is grouped with the healing tool which looks like a band aid. red eye removal healing tool

Red Eye Removal Step 3:

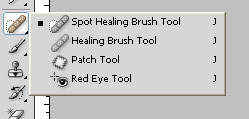
If you left click & HOLD you will see a drop down with four different tool options. 
Select the bottom, which is the Red Eye Tool.
red eye removal healing tool options 

Red Eye Removal Step 4:

With the Red Eye Tool selected you will want to go to your eye and click & drag the box around the eye. This tool will automatically correct the red eye.
red eye removal 

While the Red Tool is selected, if you look at above your top tool bar on the left you will see two settings you can change which is Pupil Size & Darken Amount. If you don't like how your corrected red eye looks, you can adjust those settings.
red eye removal 

That is it- easy enough!


red eye removal example 

Friday, May 11, 2012

Life is Like a Camera...


Thursday, May 3, 2012

Thursday Thought


Tuesday, May 1, 2012

How to Keep Your Digital Images Safe


Whether you've sent all your photos, slides, or other film format to be converted to digital format for memory preservation, or you just have all your digital camera images just sitting on your computer or DVD, it is important to set up some safe guards. Computer crashes, fires, floods, and other unfortunate events can happen without notice, leaving your memories lost, and you in a bad mood!

     There are five ways you can store your images, and the more you have your images copied, the better your chances are of never having to worry about losing them forever.
     You can store your images as actual prints. While this solution is not storage friendly, you can always submit them to a photo scanning company, such as Larsen Digital Services to be scanned to digital format. This method of storage is very volatile, as prints can be easily ruined by floods, fire, children, etc.
     Another method of storage is to keep your images on a CD or DVD. While this is a reliable medium for now, CD's and DVD's just won't last forever! It still is a good idea to keep at least one copy of all your images on a CD or DVD to keep in a safe spot, such as a safe deposit box. Just like photos, they are prone to be damaged by fires, and even in car accidents.
     Always keep a copy of your pictures on your immediate computer. Yes, they crash all the time, but storing your digital images on your computer allows them to be readily accessible. You will be able to easily share your memories via email, Facebook, Twitter, or any other program of choice.
     A Great option right now is to copy all your images to an external hard drive, or a USB flash drive depending on how much space you need. This way, if your computer crashes, because the hard drive or flash drive is not attached to it, your images and files will be safe. You can find many cost-effective choices for an external hard drive at online merchants such as NewEgg.commwave.com, and others. Once you have purchased your hard drive, and transferred all your files on it, you will want to make sure it is stored in a well-conditioned area.
     The last option, and my personal favorite, is to find an on-line file storage company with which to keep your images. Not only will they keep your images backed up, but they will be easily accessible as well! Most on-line storage companies will charge you a minimal monthly fee depending on how much storage your data requires, but the cost of all your lifetime memories is priceless! When choosing a provider you will want to ensure that they offer password protection, as well as an encrypted file transfer. Some free online file storing companies include 4shared, Humyo, and ADrive.

You can never be too extreme when dealing with your life's legacy, so make sure you take every precaution in keeping your digital images safe.

Larsen Digital Services offers a 5 Year Data SafeKeeping Program when you convert all your old photos, slides and negatives to digital. It is a one time fee with prices starting at $8.15, and is renewable every five years!

Tuesday, April 24, 2012

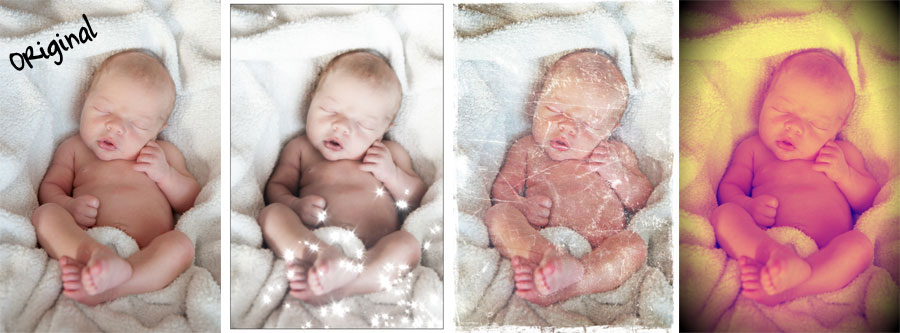
Pixlr Photo Editing Tutorial

vintage retro effects tutorial


Pixlr.com is a photo editing website that offers free editing tools. It is the easiest software I have ever worked with.
I am so excited to share how great this website is.

First: Go to www.pixlr.com

Step 1 Retro Effect:

Click on the circle that says "Computer"
This will allow you to browse your hard drive & pick a photo to add fun retro effects.
Once you have selected your photo it will appear on screen.
vintage retro effects tutorial

Step 2 Retro Effect:

First, we will add an effect to the digital image.
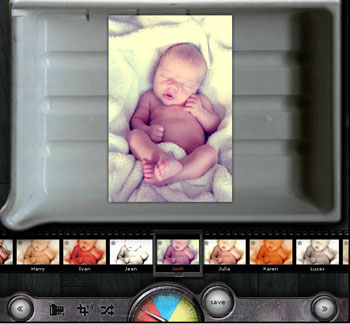
If you look below there is a film strip, this is where you will select from your different effects.
Start clicking through the different effects on the film strip and it will automatically apply the
effect to your picture. There are a lot to choose from and they are a lot of fun.
Once you have found an effect you like, you can move on to adding an overlay.

Step 3 Retro Effect:

Next, we can work on adding an overlay.
If you notice at the bottom middle part of your screen there is a three colored odometer,
click on the blue triangle. Click through the different overlay effects.
Some of them are really dramatic and others are more subtle.
Once you have chosen your overlay you can move on to adding a border.

Step 4 Retro Effect:

Click on the yellow triangle of the odometer and you can click through the different borders.

Step 5 Retro Effect:

Once you are done you just need to save your image. You can either hit the SAVE button
or hit the button with the two forward arrows. You can either save your file as a jpg or an imm.io.
The imm.io a Pixlr service to easily share the image online with friends and family.
For now, I am just saving my images onto my hard drive.

Tips


vintage retro tutorial

-If you ever want to go back a step click on the button with the two arrows pointing to the left
-Next to the left arrows you will see a negative canister image, if you click on it, you will have access to even more effects, overlays & borders to choose from.
-Next to the negative canister there is a crop button that will adjust your crop on your picture.
-Next to the crop button there are two crisscrossed arrows. This will randomly apply different effects, overlays & borders to your digital image.
-Next to the odometer is a SAVE button, which means you can save your image at any time. So if you want a version saved with just an effect or just the overlay & nothing else you easily can.

Monday, April 23, 2012

FREE Video Tape!


Get your free video tape transfers today!

Thursday, April 12, 2012

Thursday Thought

Tuesday, April 10, 2012

Beginners Guide: How to Resize Your Images

As the years pass, digital images are coming with higher and higher quality. Typicially, the higher the quality is, the higher the megapixels are, resulting in a large file size. When emailing digital images, you don't want to attach a10MB file- so you will need to resize it. Other hassles you might run into include uploading digital images to various social sites that have file size or dimension restrictions. Resizing your digital image will avoid these problems and make it easier for friends and family to view your digital image.

To understand what size you want, you need to understand what "pixels" mean. A digital image is made up of pixels or dots. The number of pixels per square inch is what makes up your dimension. For example, a 12 Megapixel digital camera will give you the dimensions 4000x3000.

When emailing pictures to friends & family, I like to resize my images to ~2000 pixels on the long side.

To resize an image in Photo Shop follow these steps:

Resizing Step 1

Go to your tool bar & select IMAGE
Then select IMAGE SIZE
Or just hit " ALT+Ctrl+I "

Resizing Step 2

A window will pop up which will tell you what your current dimensions are set at. You can work in pixels or percents -I prefer to work in pixels.

resize digital image

I am going to change my width to 2000,, which automatically changed my height to 1500. This is important to note, because if the box "Constrain Proportions" is unchecked, you will end up with a squished image (See Example Below). Having this box checked means that when you change one dimension, the other dimension will change in relation.

Hit "OK" when you are done changing your dimensions.

Resizing Oops!


resizing image preserve aspect ratio

Resizing Step 3

You are almost done resizing your image- you just need to save your file. IMPORTANT - don't save over your larger image, create a new copy.

Go to your tool bar & select FILE,
then go down to SAVE AS
& then create a new file name.

If you are saving a JPEG image a window will pop up asking what quality settings you want. Unless want to compress you image, save it as Maximum quality setting.

That's it! You now know how to resize a digital image!

Wednesday, April 4, 2012

Wednesday Deal: FREE Shipping!

Get Free Shipping on your order to Larsen Digital Services!

Tuesday, April 3, 2012

How to Edit Your Photos in PaintShop

Do you have digital images that just don't look right? Pictures often get faded, or gain a reddish or bluish hue. You can fix these imperfections simply using editing software like PaintShop Pro. After reading these steps, you should be a pro at applying simple editing effects to your own digital images.

1- Lets get your settings in place. Once you have opened up Paint Shop, you will see a gray bar that spans the width of your software window (under the choices for 'File', 'Edit', etc). Right click on this gray bar and scroll down to the option "Toolbars". To the left of "Toolbars" will be choices for which tools you want to have open in that gray space. Click on "photo", and those editing options should appear. To find out what each icon in the toolbar does, just hover your mouse over the icon.

2- Make sure your image is rotated correctly! It's really hard to edit a photo when you don't have the right perspective on what it is. The easiest way to do this is to open the image that needs to be rotated. On your top tool bar you will find three icons in a row containing blue and white shapes, with arrows directing which way they are being rotated. These are your rotation tools. Just click on the direction that your image needs to be rotated. You will keep your image open for the rest of the editing process.

3- Next, let's take a look at your contrast/brightness. No one wants a photo that looks faded or soft. To make you images look more crisp, you will want to adjust the Contrast/Brightness of your photo. The Contrast/Brightness tool takes the blacks and whites in your images and enhances them. The icon is of a triangle, where the top is a light blue, and the bottom of it is black. Click on the icon, and a window will pop up requiring you to fill in numbers for both the contrast level, and the brightness level. If your image is really dark, start out by setting your levels both to 10, then press 'OK'. Repeat until you get your desired results. If the brightness of your picture is fine, but you just want it to look a little more crisp, set your contrast number to 10, and your brightness number to 0. Again, you will want to press 'OK' and repeat until you attain your desired results. To preview what your effects are going to look like, just press the icon that looks like an eye, which is in the 'Contrast/Brightness' window. If you like what you see, press 'OK'. If you don't like the selections you've made, simply press the eye again, which will hide the preview, and re-configure your settings.

4- Now we are going to focus on color. There are several ways to adjust the color on your images, but this technique is a manual tool where you can choose exactly what you want to be applied to your picture. The 'Adjust Color Balance' tool is a triangle that is light blue on top, and black on bottom, with a halo containing red and blue squares on the tip of the triangle. Click on this icon, and a window will pop up. Set your 'Tone Balance' to 'Midtones', and check the box beneath to 'Preserve luminance'. You will find that there are three scroll lines to adjust the color. You can either manually enter numbers in the white boxes, or you can manually move the cursor left or right to select how much you want to adjust a certain color. For instance, if your image has taken on a reddish hue, you will move the cursor between the choices 'cyan' and 'red' to the left, towards 'cyan'. This will add more cyan hues to your image, decreasing the amount of red that appears. A lot of color balancing is trial and error. To preview what your effects are going to look like, just press the icon that looks like an eye, which is in the 'Adjust Color Balance' window. If you like what you see, press 'OK'. If you don't like the selections you've made, simply press the eye again, which will hide the preview, and re-configure your settings.

Now your image looks as good as new. Have scratches, wrinkles, or writing on your images? You will need to use the 'cloning' tool to fix this, which is a whole other ball game! Check out tutorials on using the clone tool in PaintShop to make your editing skills complete.

Monday, April 2, 2012

Monday Makeover: Weber State!

We have the opportunity to scan Weber State University's collection of old film. Today, we are featuring one from their basketball collection. It's faded, off-colored, and looks out of date...

Our color technicians were able to restore the vivid colors and bring the contrast to where it should be, making this makeover a slam dunk!

Want more info about our editing services? Visit us today!