Tips, Tricks, and Tutorials

Teaching you fun and interesting things to do with your digital images. Whether it's highlighting a new app, or a tutorial on how to edit a photo, we want to help you make the most of your memories.

Featured Thought

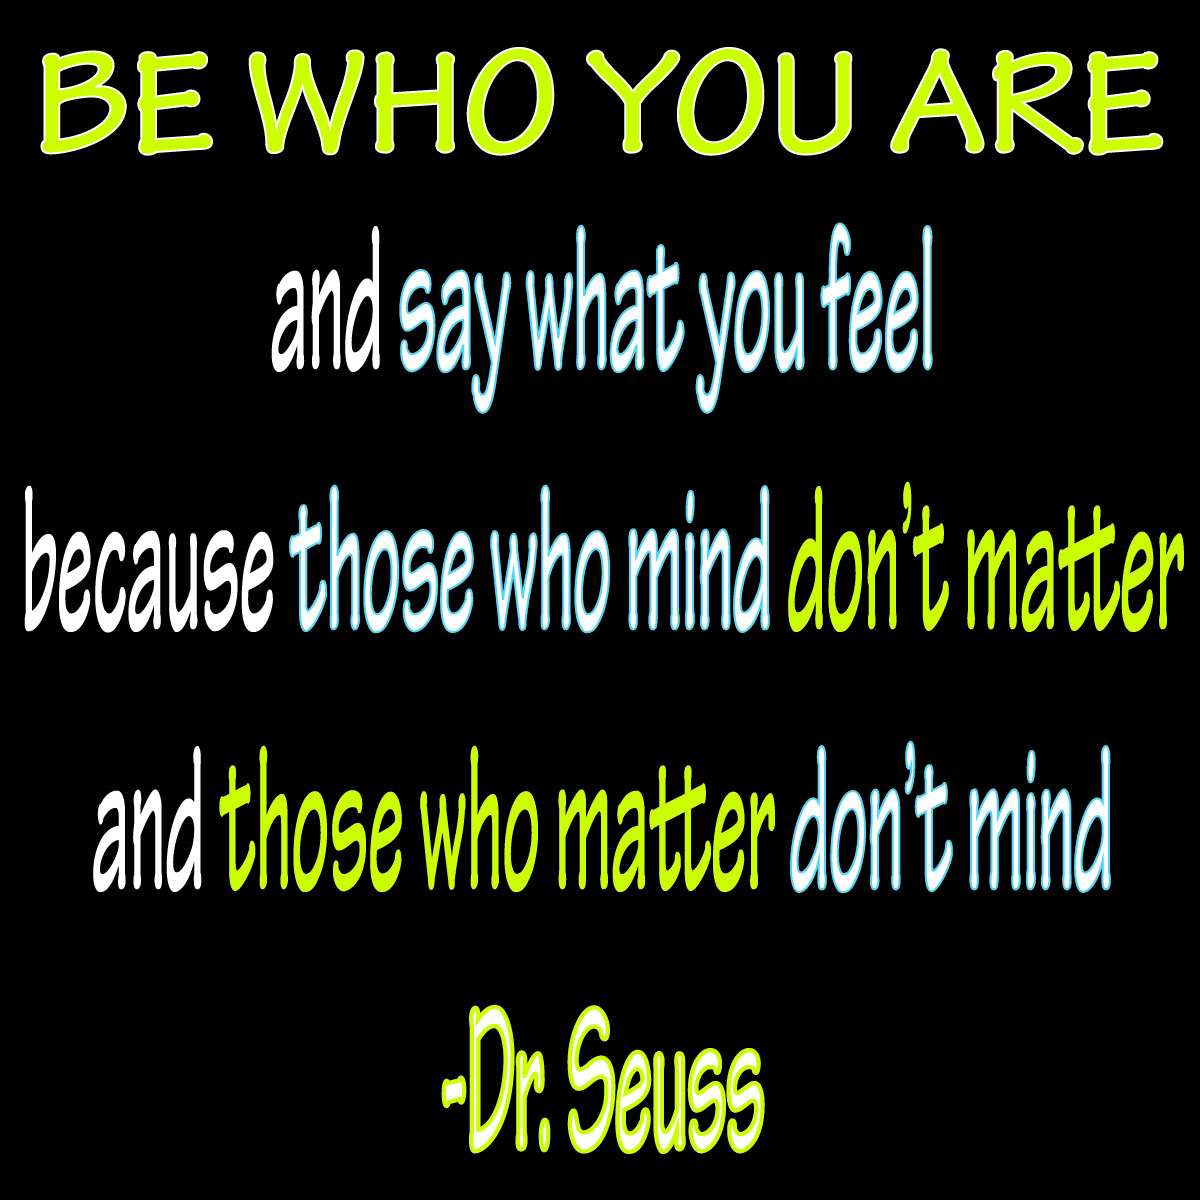
Visit our blog every Thursday when we will post a brand new thought or quote! What's the point of our 'Thursday Thought' feature? Because everyone could use a good one every now and then.

Customer Feedback

Want to see your raving reviews here? Comment on one of our social media sites, or email us at customerservice@larsendigital.com. We love hearing from you!

Digital Photo Makeover

Your old film and photos can go through a lot. Whether they are extremely discolored, torn or ripped by a child, involved in a flood or accident, we want to fix it!

Check This Out!

The world's very first photograph! We wouldn't have a business if the photography industry never progressed. It's amazing how far we come, and how advanced we continue to get.

We pride ourselves in our track record since we started business back in 1995. We have always made sure that each and every one of our customers is treated with professionalism along with a personal touch. We're proud to be the most trusted source of slide and negative scanning in North America. We are located beneath the snow-capped peaks of Mount Ben Lomond in Pleasant View, Utah. Pleasant View is 45 miles north of Salt Lake City, host of the 2002 Winter Olympics. All work is done in house here in Utah. We do not outsource any work out of the country like many other companies do.

Friday, November 30, 2012

What's Your "Magic Lantern" Slide Projector Worth?


Don't have a slide projector, but want to view your old slides?  Check out Larsen Digital's special holiday prices to convert your old film to digital.

Thursday, November 29, 2012

Christmas State of Mind


(Photo originally taken circa 1980, scanned and edited by Larsen Digital Services.)

Friday, November 23, 2012

Old Photos + Photo Book = Priceless Holiday Gift


Hi!  I’m Christa, and I have worked with Larsen Digital for just over 6 years now.  I love being a part of memory makeovers.  It’s amazing to take someone’s past and give it a new breath of fresh air by digitizing it, and bringing the colors back to life.  Because I have seen this beautiful transformation thousands and thousands of times in my career, I knew the importance of getting my family’s film together and preserving it.   I decided that I wanted to get my grandparents photos and make a book for them for the holidays.

First, I scanned their pictures, and edited them to perfection.
Isn't that amazing?


Next, I was on the lookout for the best photo book company I could find.  The one I chose is called Paper Coterie.  I chose them because of their easy user interface, book design options. themes, and price. 


I can’t wait to give this gift to my grandparents for Christmas, I know it will bring tears to their eyes looking back on what a great life they have lived.


Don’t have your film digitized yet?  Take advantage of our Black Friday Sales going on until Monday!

Black Friday Deals

Oh yes, we are in on the Black Friday events as well!  We are offering discounts on a lot of our services, so if you were teetering on the edge of ordering, NOW is the time!  Get your discount today:


Free Shipping

Free Fed Ex Ground Shipping 
Code: FreeShip

Slides

Any Resolution 35¢ 
Code: BlkSlide
Offer Valid on 35mm Slides, 126 Slides, Mounted 110 Slides, Super 35mm Slides & Half Frame Slides. 
Offer is for Standard Processing. Slide Conversion

Negatives

Any Resolution 35¢ 
Code: BlkNeg
Offer Valid on 35mm Negatives. 
Offer is for Standard Processing. Negative Conversion

Movie Film

High Definition Transfer 15¢ per foot 
Code: BlkMovie
Offer Valid on 8mm, Super8 & 16mm Movie Film. Movie Film Conversion

Video Tapes

20% off Video Tape Transfers of $30 
Code: BlkVideo
Offer Valid VHS, VHS-C, 8mm Tapes, Digital8 Tapes, Hi8 Tapes, Beta Max, Mini DV & Mini DVD. 
Discount is not applied to Hard Drive or Thumb Drives. Video Tape Convesion

Photos

Any Resolution 29¢ 
Code: BlkPhoto
Offer Valid on photos sized 5x7 & under. Photos larger than 5x7 will incur an additional charge. 
Offer is for Standard Processing. Photo Conversion

Wednesday, November 21, 2012

Unique Gift Ideas for Parents

Check out this awesome article over at Lifestyle Tips if you want to find a unique way to show your parents or grandparents even, that you love them!


For more information on Converting your Memories to Digital, as suggested in the article, visit our website.


Monday, November 12, 2012

Press Release: Now Offering Reel to Reel Audio Transfers!


We are so excited to now offer Reel to Reel Audio Transfers to our services!


In a Press Release sent out today, Brent Larsen, CEO of Larsen Digital said, "Hearing the recording of my parents wedding reception for the first time, 50 years after the event occurred, was a very emotional experience. It made me realize that life's moments are not just captured in pictures and videos, but in audio too. That is why it was so important to me to offer this service to everyone, so anyone can track down their old audio reels and experience those memories and to share them." 
View our order form and get your audio reels transferred to digital today!

Thursday, November 1, 2012

Press Release

At Larsen Digital, we love our community and want to help where we can.  We believe in activities that help individuals grow and bring people together.  This is why we are proud to be a sponsor of Weber State University Athletics and their annual Cat Bash Auction to raise money for scholarships.  To learn more about our participation we invite you to read our latest press release.


Thursday, October 25, 2012

Happy Halloween!

Hoping you have a fun and safe Halloween this year!

Thursday, October 18, 2012

"Before the Computer"


Thursday, September 27, 2012

Thursday Thought- He Really Was a Genius!


Monday, September 17, 2012

Cool Gadget

The Almighty Board
The Almighty Board
A cooking tool that allows you to weigh food, read your recipes, use it as a cutting board, and recipe step by step cooking instructions?  Read more about it at 'Tom's Style'

Friday, September 14, 2012

Family Mysteries- What Really Happened?


Thursday, September 13, 2012

One Perfect Memory


Thursday, September 6, 2012

Thursday Thought


Thursday, August 30, 2012

MyMemories Suite v3 Tutorial

So you've had your images all converted to digital format and you want to do something special with them?  Well digital scrap-booking is the perfect answer, and the My Memories software is ranked as the best!  With this software you can create photo books, download your digital scrapbook on your iPod for portable viewing, or even create a calendar using the designs you create!  Here you will learn the most simple way to create your first digital scrapbook.

Step 1: Open the software.  You have the option to create your scrapbook using pre-designed templates, or by starting on a blank slate, and creating your own.  For the purpose of just learning the software, this tutorial will go the route with the ready to go pages, so select “Create Album From Designer Template”.


Step 2: Choose the template style you want your scrapbook to be.  They have choices from Winter and Halloween, to Contemporary and Simple.  I have decided to use the “Sweet Baby Girl” set.


Step 3: Organize the order of your pages.  You can add more pages so that certain styles repeat by doing a simple drag and drop, or you can removes templates that you don’t like by selecting a page in the “Page Arrangement” section, and simply clicking “Remove”.


Step 4: Let’s choose our settings for how you want your images placed.  The software will ask you if you want to “Pick and Click” which will allow you to choose the pictures you want, and place them wherever you want.  There is also an option to do a “FastFill”, where you still get to select what pictures you want in the scrapbook, but the software will automatically place it in photo slots.  This tutorial will show you how to do the “Pick and Click” option.


Step 5: Now it’s time to designate where you want your scrapbook to be saved on your computer, and what to name it.  Click “Finish” when you have completed these sections, and let the fun begin!


 Step 6:  Your first scrapbook page will automatically load, and you will see there are grey images with the text “Your Photo Here”- that’s where your pictures will go!  To choose your pictures, click on the “Photos” icon under the “Photos” tab.


Step 7: While choosing your photos, you can view a small thumbnail version on the side to help in your decision making.  This software allows you to only choose one image at a time, so when you have picked an image, press “OK” to place it on your page.


Step 8: Now your image is on the page, but it needs to be placed in the gray area!  Simply click and hold your mouse on the image, and drag it over to the gray area until that said area turns blue, as shown in the picture below.  Release your mouse and your image is now in it’s designated spot!


Step 9: Personalize!  For adding your own text,  just click on the “Add T” under the “Text” tab, and a text box will appear where you can enter whatever text you wish.  Or, to just change the text in the pre-designed text box, click on “Your Text Here”.  To make the text have more of a designed element to it, select the “Word Art Designer” tab.  This software also enables you to add embelishments.  You can choose which embellishments to add by selecting the “Embellishments” tab.  Embellishments will include decorative images such as the bows and ribbons already seen on the page shown.  They will also have choices for art images such as pencils and paperclips for a back to school feel, or abstract designs for a background element.


Step 10:  Once you have placed all the images and extras you want on each of the pages in your album, select the tab “Check Album” where you can preview what your scrapbook will look like, and check for spelling and errors.


Step 11:  Now that you have completed your digital scrapbook, click on the tab “Share Album” where you have lots of choices in saving your book.  You can print your book, create a photo book or calendar, or even put the scrapbook on your ipod!  


After completing this tutorial you will be a pro at managing this digital scrapbooking software!  You can probaby even design your own templates!  For more questions on managing this program, as well as purchasing additional templates, pages, and embellishments, visit www.mymemoriesblog.com.

Thursday, August 23, 2012

Thursday Thought


Thursday, August 16, 2012

Back to School Special!


Enter code BACKPACK15 at checkout
and receive $15 OFF your purchase of $100 or more!

Thursday, August 2, 2012

Thursday Thought


Tuesday, July 24, 2012

Our Picks: FREE Photo Editing Software


This list is for those who:
1)      Cannot afford professional photo editing software such as PhotoShop,
-Or-
2)      Are novices when it comes to editing your own images.
 Here we will rank 4 different FREE photo editing software programs to help guide your decision.   Each category is rated on a scale of 1 to 5, with 5 being absolutely amazing, and 1 being extremely lacking.

GIMP

User Friendly-2
Available Functions-4
Results-4
Overall Score-3         
                      
Pros: This software is what you want if you are looking for a free version of Adobe PhotoShop.  It offers numerous technical functions from brightness adjustment and cloning to vector art creation and image distortion.
Cons: Not for the casual photo editor!  If you are a beginner there will be many youtube tutorials in your future as you learn the basics in using this software.  It also requires a download of the software rather than working on a webpage, so you will want to make sure your computer can handle it!
Bottom Line:  The best free software for those who know what they are doing!

Fotoflexer

User Friendly-3
Available Functions-2
Results-3
Overall Score- 2 1/2   
               
Pros: Lots of fun effects, text additions, and borders!  With Fotoflexer you can upload your edited images straight to your favorite social media website.  Edit without having to download anything!  All you need to do is visit their website, upload your photos, and edit away.
Cons:  While this software contains a lot of fun effects, it’s actual photo editing functions are limited, and most are automated. 
Bottom Line:  Good website for creating fun imagery with images that need little to no fix-ups.

Picasa


User Friendly-4
Available Functions-3
Results-3
Overall Score-3 1/2   
                                         
Pros: Contains lots of interesting photo effects, and a neat Creative Kit.  Allows you to add text to your images, and use the program as a default photo viewer.
Cons: As with fotoflexer, this software comes with limited functionality.  Picasa does require a download to your computer.
Bottom Line: Lots of fun effects and stickers + Solid Basic Photo Editing Functions = Awesome Free Software

Windows Live Photo Gallery


User Friendly-2
Available Functions-2
Results-2
Overall Score-2    
                            
Pros: Windows allows you to create slideshows and movies with this free software, as well as order prints and upload your edited images to your favorite social media website.
Cons:  While it does contain a high quality clone tool for fixing imperfections, there are not many other functions to choose from when using this program. 
Bottom Line: It’s an ok free program.  Better than nothing! 

Thursday, July 12, 2012

Thursday Thought- Happiness


Thursday, June 28, 2012

Thursday Thought


Wednesday, June 27, 2012

What to Look For When Buying a Camera


Those in the market to buy a digital camera are in the right place!  There are so many terms used when researching, and it’s important to know what they are, so you get what you need!  Here you will find the most common verbiage when dealing with digital cameras to help you in your exciting purchase.

First, there are 3 main types of cameras:

SLR (Single Lens Reflex) - A camera that uses a mirror system to direct light, and can offer more accurate framing and depth of field.  Because of this, what you see in the viewfinder is exactly what your picture will be.  The user can manually adjust the lens’ focus, and many other features.
DSLR (Digital Single Lens Reflex) - The same as an SLR Camera, however this camera stores your images in digital format on a memory card.
Point and Shoot - An easy to use camera with limited functions.  Most use autofocus, with flash units that are built in.

Now onto the features that you should look for, or know about in a camera:

AC Power- Your camera will be charged in a wall outlet or computer USB port rather than by traditional batteries. 
Aperture- How much your lens opens through which light will pass.
Aspect Ratio- The ratio of your images’ horizontal and vertical dimensions.   Most cameras have an aspect ratio of 4:3, but if you are looking to be able to print perfect 4X6 images, then look for a camera that offers 3:2 ratio mode.
Aspherical Lens- A lens that is not perfectly spherical, but creates superior images by reducing or even eliminating aberrations (lighting imperfections).
Digital Image Stabilization- Used to minimize the effect of blurring or shaking while the camera is in the process of capturing video.
Digital Zoom- Magnifies the center of an image, keeping the same aspect ratio, while reducing the amount of pixels.
Exposure- The amount of light that reaches the photographic film, and is determined by the shutter speed and aperture
Frame Rate- How many image frames are shown per second.  The higher the Frames per second, the more “real” or “in person” the imagery looks.
Image Resolution- Amount of pixels in the length of an image- Referring to the detail of the image.  The higher the resolution, the more detailed your picture will be.
Macro- Offers the ability to focus really well on small objects that are close to the camera.
Megapixel- A measurement to describe how many dots or pixels are in an image.   The more pixels contained in an image will mean more detail, and more detail in an image means you can make large prints from your images.
Optical Zoom- Allows the camera to zoom in on an object without affecting the detail or resolution of the image.  It uses the lens to draw the image closer, much like binoculars.
Pixel- One Pixel refers to one spot on an image.  Pixels combine to make up the resolution of an image, and as with most everything, the more pixels you have, the better your image is going to look.
Shutter Speed- How long the camera’s shutter stays open to capture an image.

Friday, June 22, 2012

Unsolved Family Mysteries

What you are about to see is a true story.


To learn more about preserving your memories visit our website

Thursday, June 14, 2012

Thursday Thought


Tuesday, June 5, 2012

Beginners Guide To Using Cinemegr.am

Cinemegr.am is a new app that combines the power of video with the stillness of photo to create fun and quirky imagery.

Here is an example:
Created with cinemagr.am
(Notice how the street is moving, but the signs and lights are still?)

Here we will show you how to create such a visual, with added effects such as giving it a vintage touch.

1-Get the app installed!  It's currently only available for your apple products.
 2- Your home page will look like the image below.  To view the work of others, click on "popular" or "latest".  To create your own, click "capture"
 3-Film whatever it is you want!  Most likely, your footage will be too long, and you will be required to edit it down.  Like the image below, you will need to select a portion of frames that will fit between the yellow lines at the top.
4- Create your mask!  Selecting where you want your mask to be tells the app what parts of your video you want to remain moving.  Everything else will remain still.  Simply color over the desired areas with your finger to color your mask.
5-The next step is to add your vintage flavor.  Cinemegr.am gives you several options, or you can simply leave it "raw" or untouched.
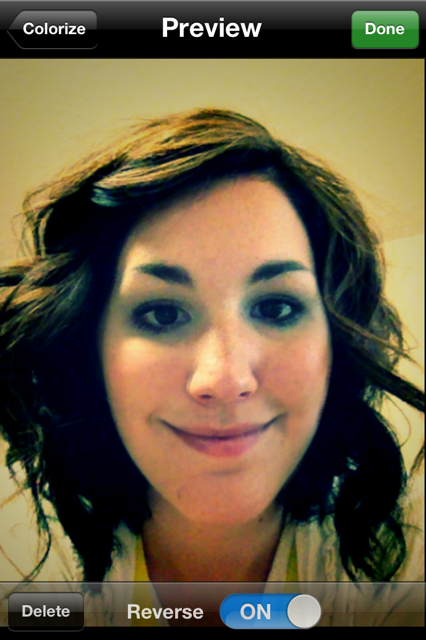
6-Last step is to preview your work.  You can decide whether you want the "Reverse" on or off.  With the "Reverse" on, it will play through once, then immediately replay going backwards.  Press "Done" and you've created your cinemegr.am!  Your video will appear in a news feed, much like Instagram.

Here is our final product:

Created with cinemagr.am

Hope you've enjoyed creating your own cinemegr.am invention.  It can be a fun and interesting way to share the moments of your day.

Thursday, May 31, 2012

Larsen Digital's Thursday Thought!


Tuesday, May 22, 2012

Beginners Guide to Removing Red Eye

red eye removal before and after

red eye removal example
Red eye is an annoying and common problem with photos when taken using a flash. Luckily fixing red eye is extremely easy using PhotoShop.

Red Eye Removal Step 1:

Once you have your digital image opened in PhotoShop you will want to zoom in on the eyes. Your zoom tool is located on the left side panel, it looks like a magnifying glass.red eye removal zoom

Red Eye Removal Step 2:

Next you will want to select your Red Eye tool. It is located on the left side panel. It is grouped with the healing tool which looks like a band aid. red eye removal healing tool

Red Eye Removal Step 3:

If you left click & HOLD you will see a drop down with four different tool options. 
Select the bottom, which is the Red Eye Tool.
red eye removal healing tool options 

Red Eye Removal Step 4:

With the Red Eye Tool selected you will want to go to your eye and click & drag the box around the eye. This tool will automatically correct the red eye.
red eye removal 

While the Red Tool is selected, if you look at above your top tool bar on the left you will see two settings you can change which is Pupil Size & Darken Amount. If you don't like how your corrected red eye looks, you can adjust those settings.
red eye removal 

That is it- easy enough!


red eye removal example 

Friday, May 11, 2012

Life is Like a Camera...


Thursday, May 3, 2012

Thursday Thought